Removing Driver Side Headlight - VW GTI 2016 with HID Headlight Package
- Ray Alner

- Aug 4, 2024
- 4 min read
Water in Assembly - Why
I’ve had a lot of issues with moisture in my headlight. TL:DR, I had them replaced due to other issues and the assemblies were not manufactured well. I went through a few assemblies and ended up getting out of warranty period when the next one was showing failures so had to fix them myself.
I ended up coming across this Technical Service Bulletin that described that it was “normal” which was what the dealer explained to me, but it caused the DRL to fail and the VW denied that it was caused by moisture, so took matters into my own hands and re-glued the assembly so it wouldn’t let water in. Still TBD if it fixed the issue, but so far when I glued other parts of the assembly it stopped moisture from coming in the headlight.
What you Need
T25 Torx Screw Driver
T25 Torx Right Angle Ratchet
T25 Small Right Angle Ratchet (I used this one and found it worked well, but any smallish ratchet works too)
T27 Torx Ratchet (seemed to fit one of the Torx heads better, but pretty sure they are all T25).
How to Remove the Assembly
Turn the car on and turn the wheel to the left for the driver side assembly.
I disconnected the battery, as a precaution but probably doesn’t need to be done.
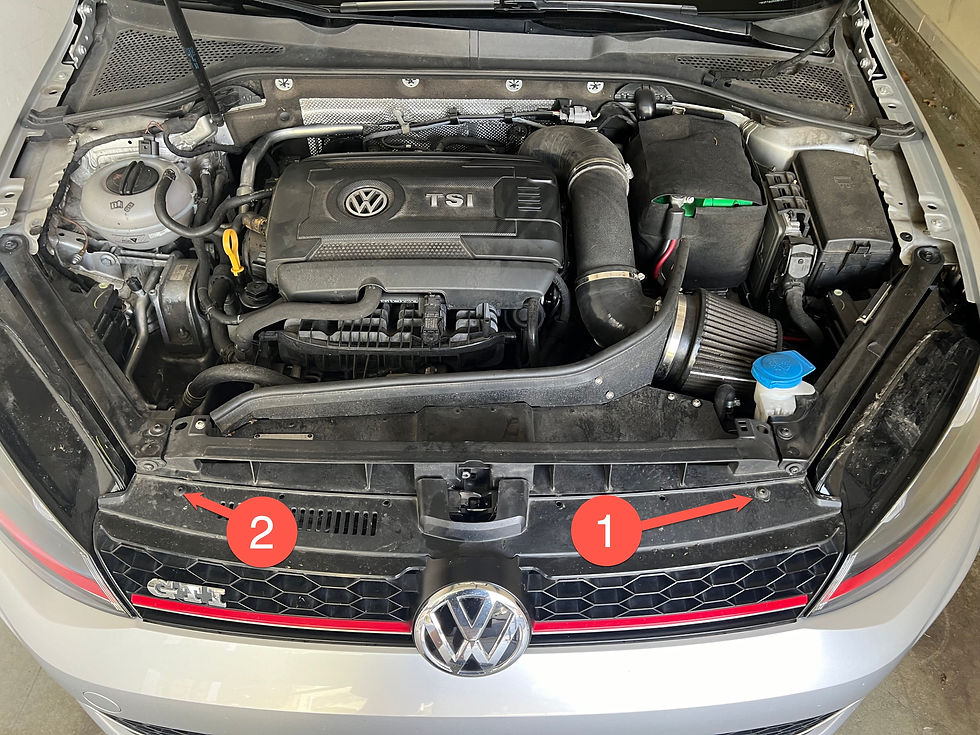
Remove grille (2 screws) T25 Heads, the grille should just lift up and out

Remove top headlight bracket (3 screws).
It’s also connected to the washer fluid container, you will need to pop the funnel out of the bracket.
It’s also connected to a cable, you just need to remove the cable connection.

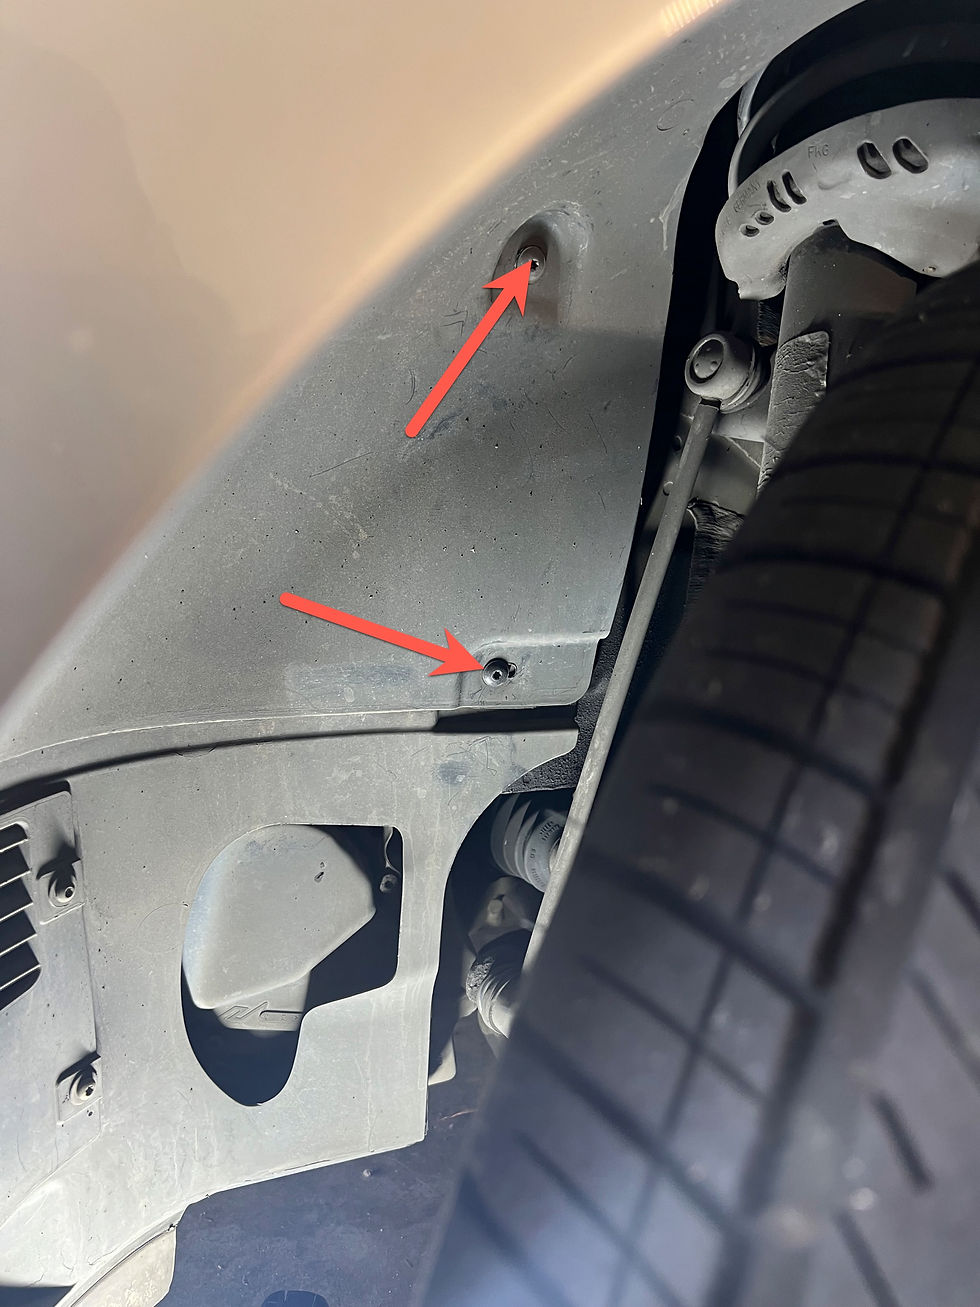
Remove Headlight Screws (3 Screws). Two screws are easy, the third requires dropping the bumper.
Screw 1 (T25 Torx) is at the front of the headlight, this comes out as usual.
Screw 2 (T25 Torx) is at the back of the headlight. This is attached to bushing fastener clip so it won’t come out, it’ll just loosen and stay on the assembly.
Screw 3 requires the bumper to come down a bit.


Let’s drop the bumper to get to the third screw holding the headlight in.
There are five short T25 screws you need to pull out under the wheel arch.
There are two long ones, I lost track which ones go in where, but I think the long ones go into the plastic in the inside wheel arch, but just keep track of which ones went where and you should be good.
OPTIONAL: There are three screws that hold the bumper to the car, I found when I removed them it gave me a little more flexibility but not much, but couldn’t find out which other screws to remove to give me more flexibility, so just lived with the tight space.


After you’ve dropped the bumper you can reach the last screw holding the headlight in. This one is also a T25, but also could use a T27, it was tight so didn’t really keep track of which Torx head I used.

Don’t forget to disconnect the headlight plug, mine was cracked by the dealer so don’t have any words of wisdom on how to unplug.
Once unscrewed & unplugged, the assembly should just slide out.

Here you can do whatever you need, either replacing the bulb, or the modules as needed.
When re-installing the assembly, be careful that you don’t scratch the bumper, I’d recommend putting a towel over the bumper when you take it out and put it back in.
Replace the HID Bulb
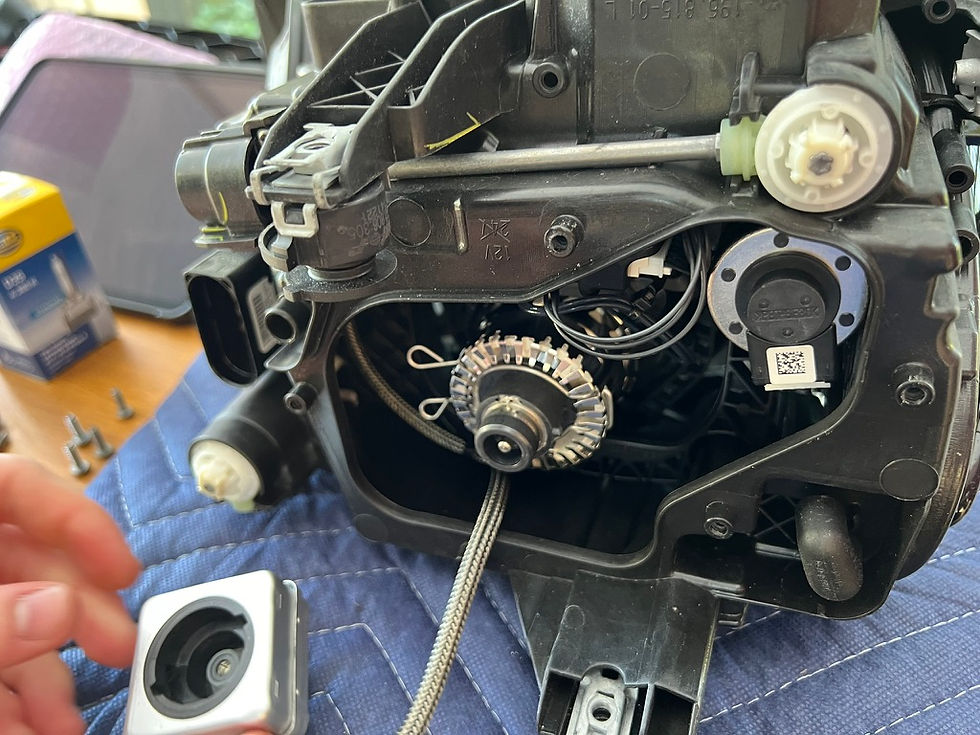
I replaced the HID bulb because the water caused it to fail. After I got the assembly out, I replaced the bulb. I didn’t take good pictures here, but here’s the gist. I used this bulb from FCP Euro.
Unscrew the back panel.
You will see a clip on the left side (assembly right side up), a silver cable connected to the base of the bulb. I was able to wiggle/twist the base of the bulb out of the bulb and then remove the cable from the base of the bulb.

Pinch the clips in (this is where I get a bit foggy on the details) and it should come out somehow. Just be careful you don’t scrape the bulb or break the bulb when you pull it out.
Insert the new bulb, it should just slide in and may twist, then the clip should re-engage.
Reverse the steps to screw everything back up.
Replace the DRL Module
My DRL module failed due to water ingress, even though VW denies that, that module is at the bottom and isn’t sealed very well so obviously is going to drip to the DRL module and cause it to fail. Well known design flaw. I used this module from FCP Euro.
Flip the assembly upside down
The DRL module is the highest module on the assembly, located in the middle of the assembly.

Remove the screws and gently pull the module out. They are all different so keep track of which screws were where.
Unclip the module and install the new module.

Reverse the steps to screw everything back up.


Comments